> ## Documentation Index
> Fetch the complete documentation index at: https://docs.voltic.one/llms.txt
> Use this file to discover all available pages before exploring further.
# Install Contact Sensors (Window and Door)
> Installation guide for the Voltic Contact Sensor PRO magnetic sensor for hotel room doors and windows.
The Voltic Contact Sensor PRO is the same model for door and window. It detects opening and closing via a magnetic sensor and allows the system to turn off HVAC when an open window is detected.
## Sensor identification
The inner packaging label indicates the installation type:
* **P** = Door (Puerta)
* **V** = Window (Ventana)
## Window sensor
### Placement
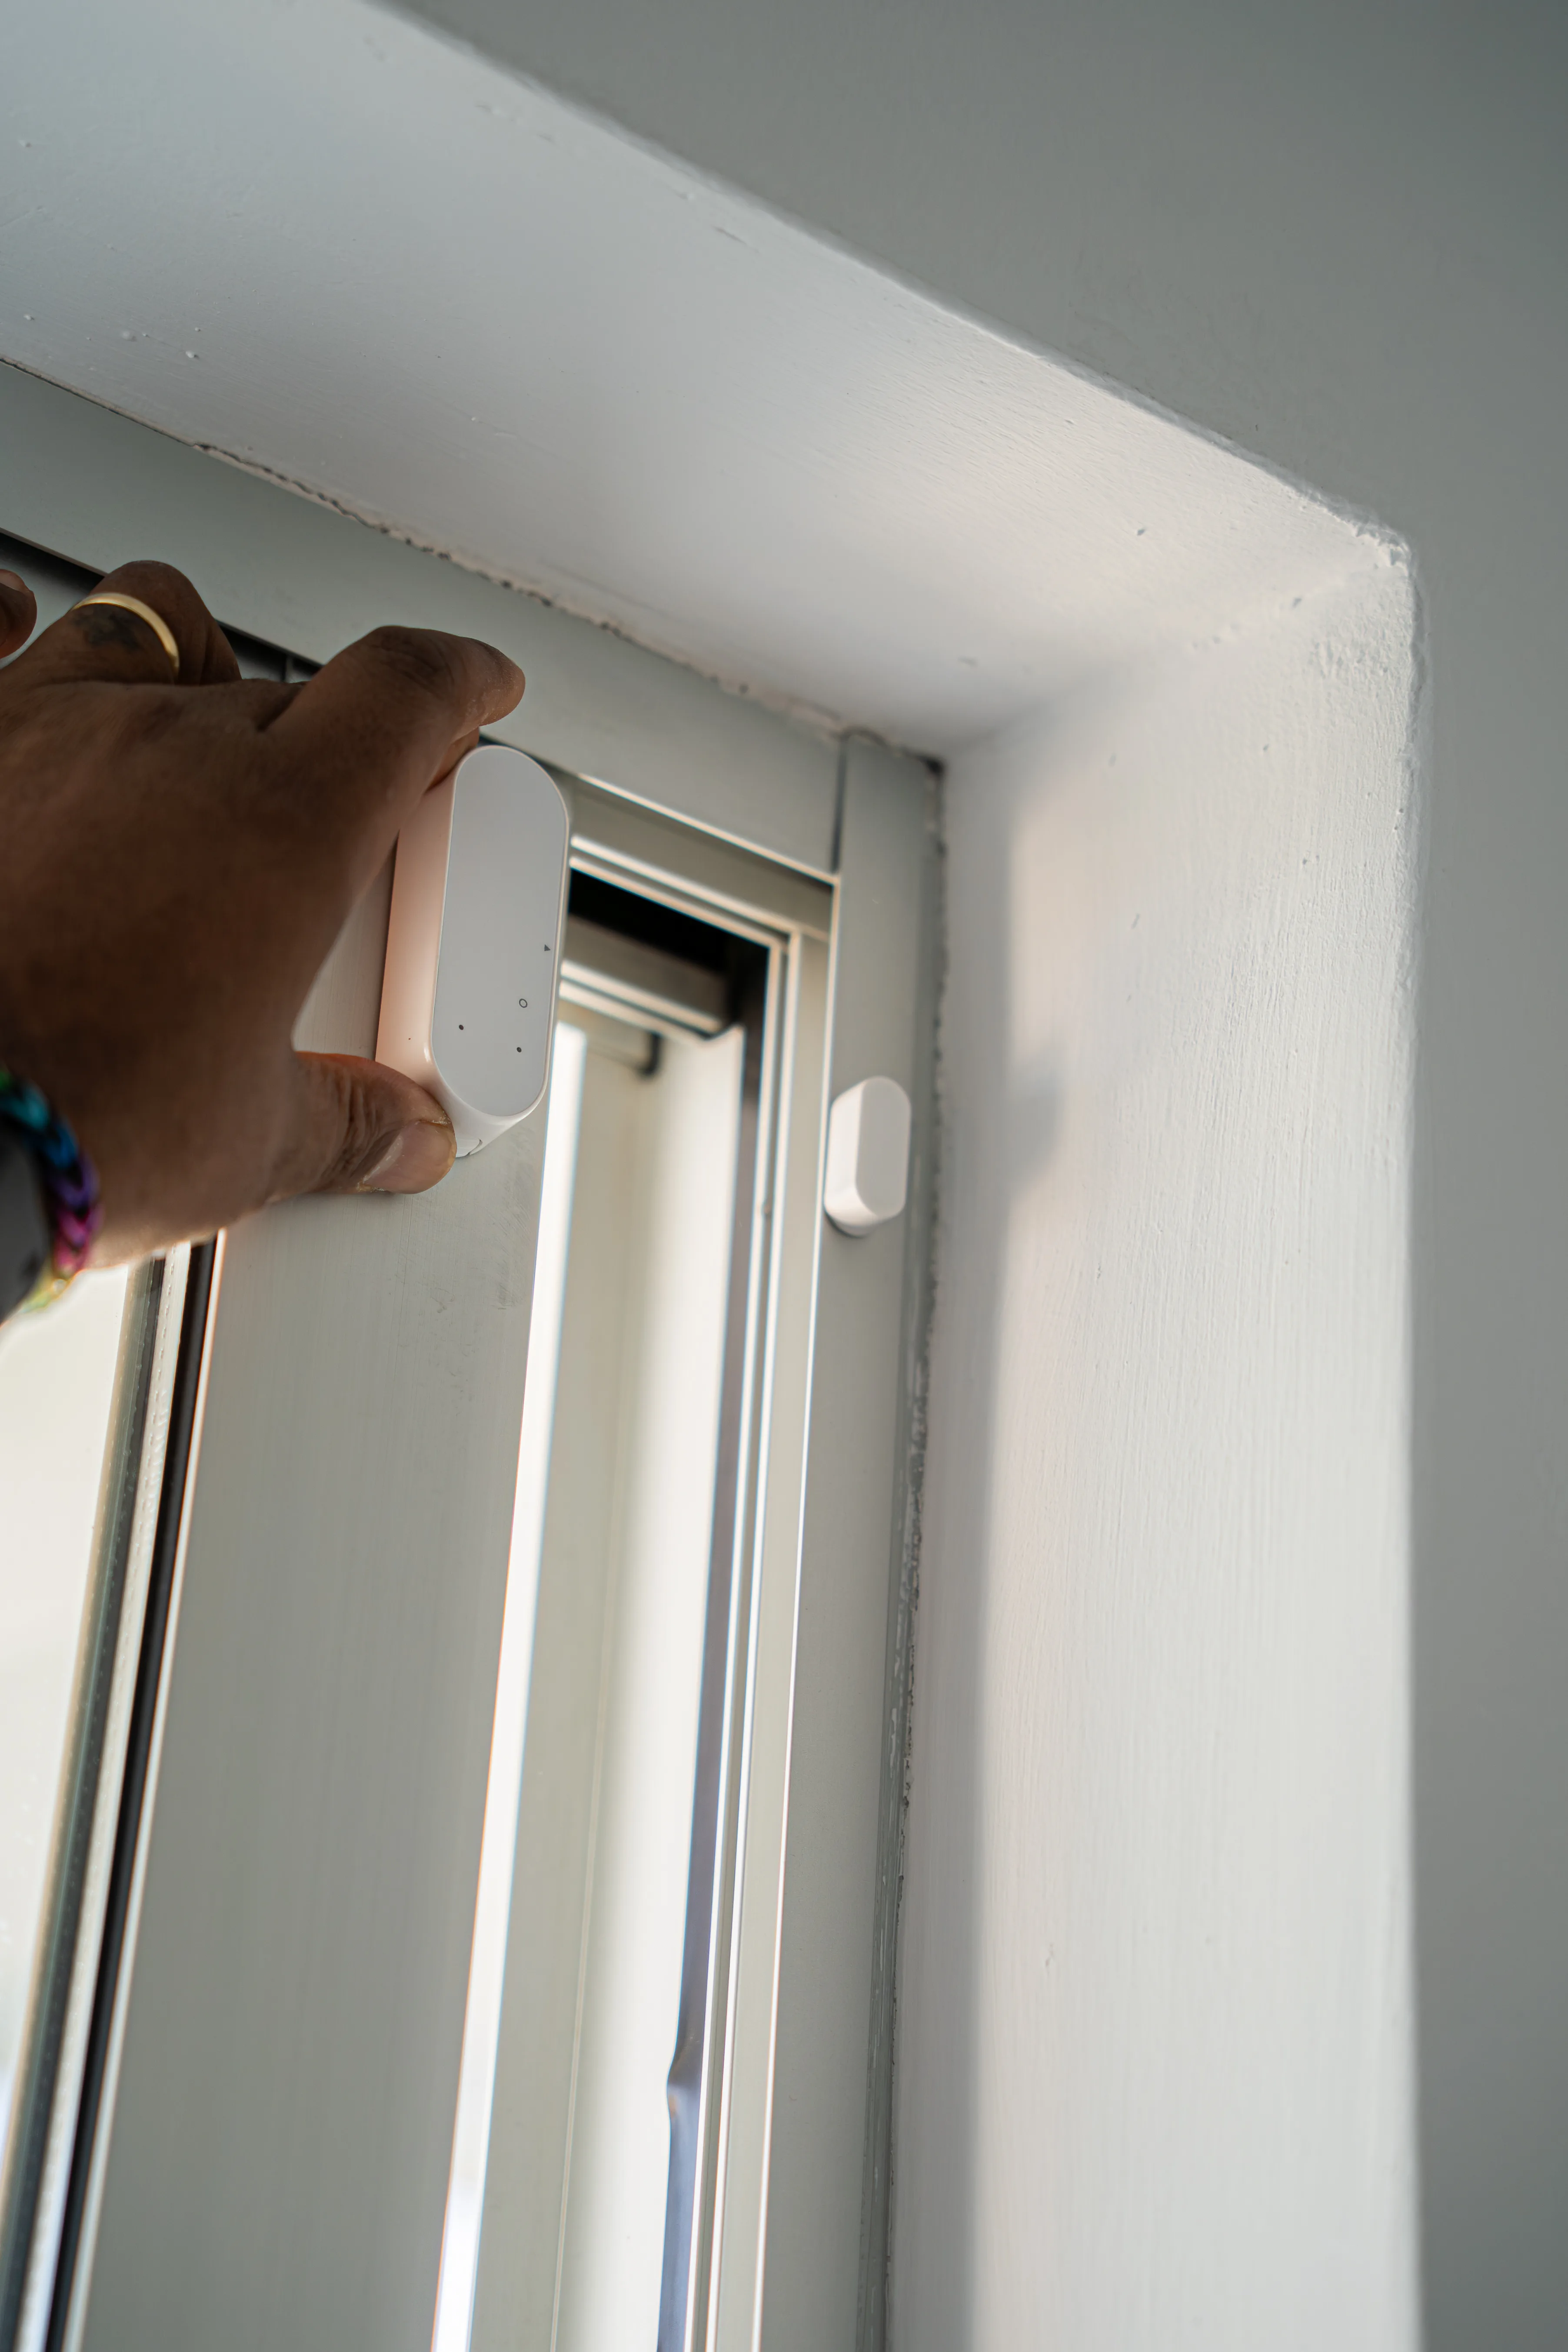
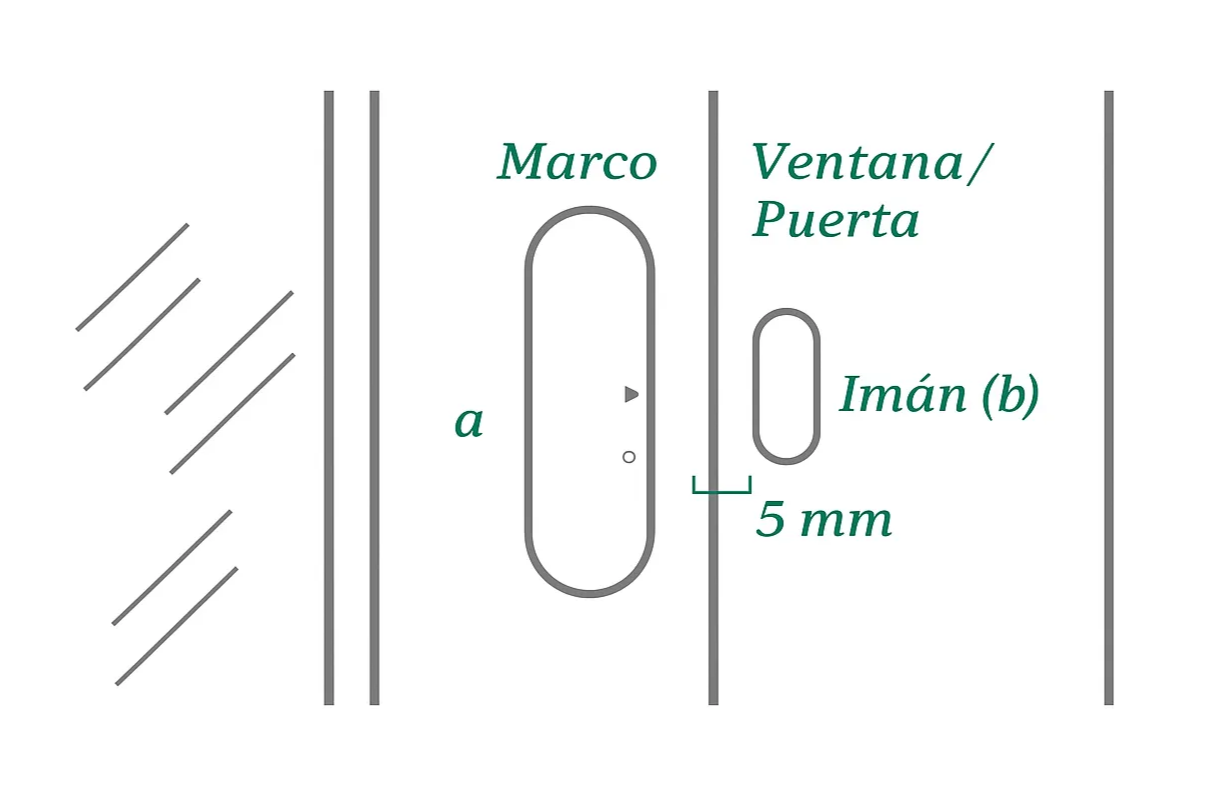
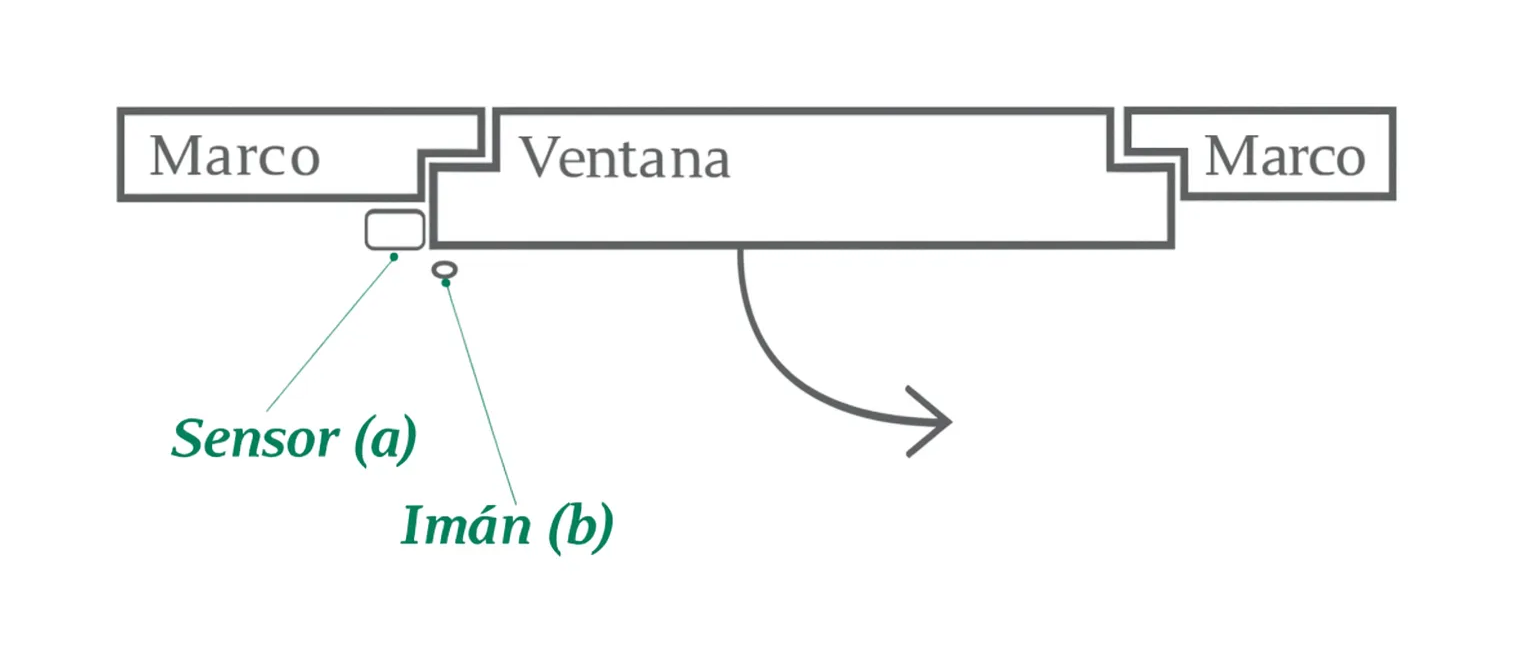
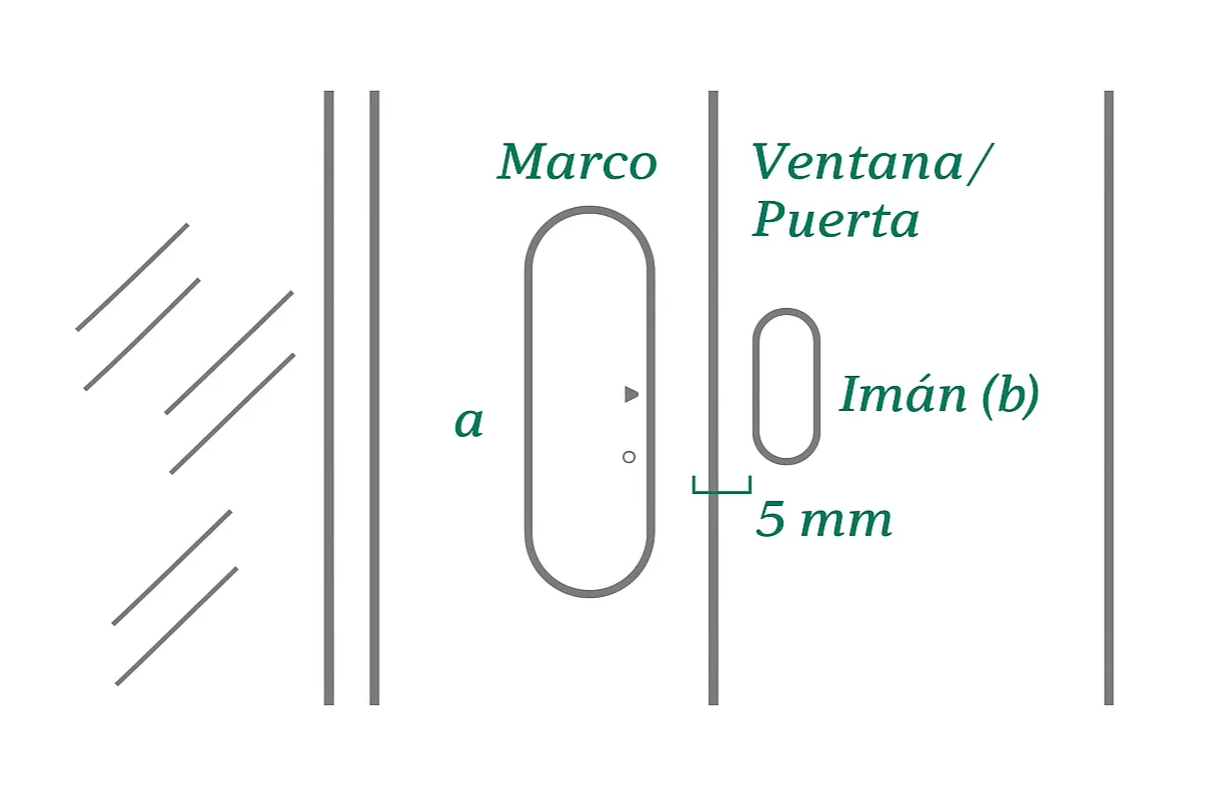
* Place the sensor on the window's fixed frame.
* Place the magnet on the moving sash.
* The sensor's triangle must face the magnet.
* Distance between sensor and magnet: between 2 and 5 mm. On magnetic surfaces, keep a distance of 1 to 3 mm. Never exceed 5 mm.
## Door sensor
### Placement
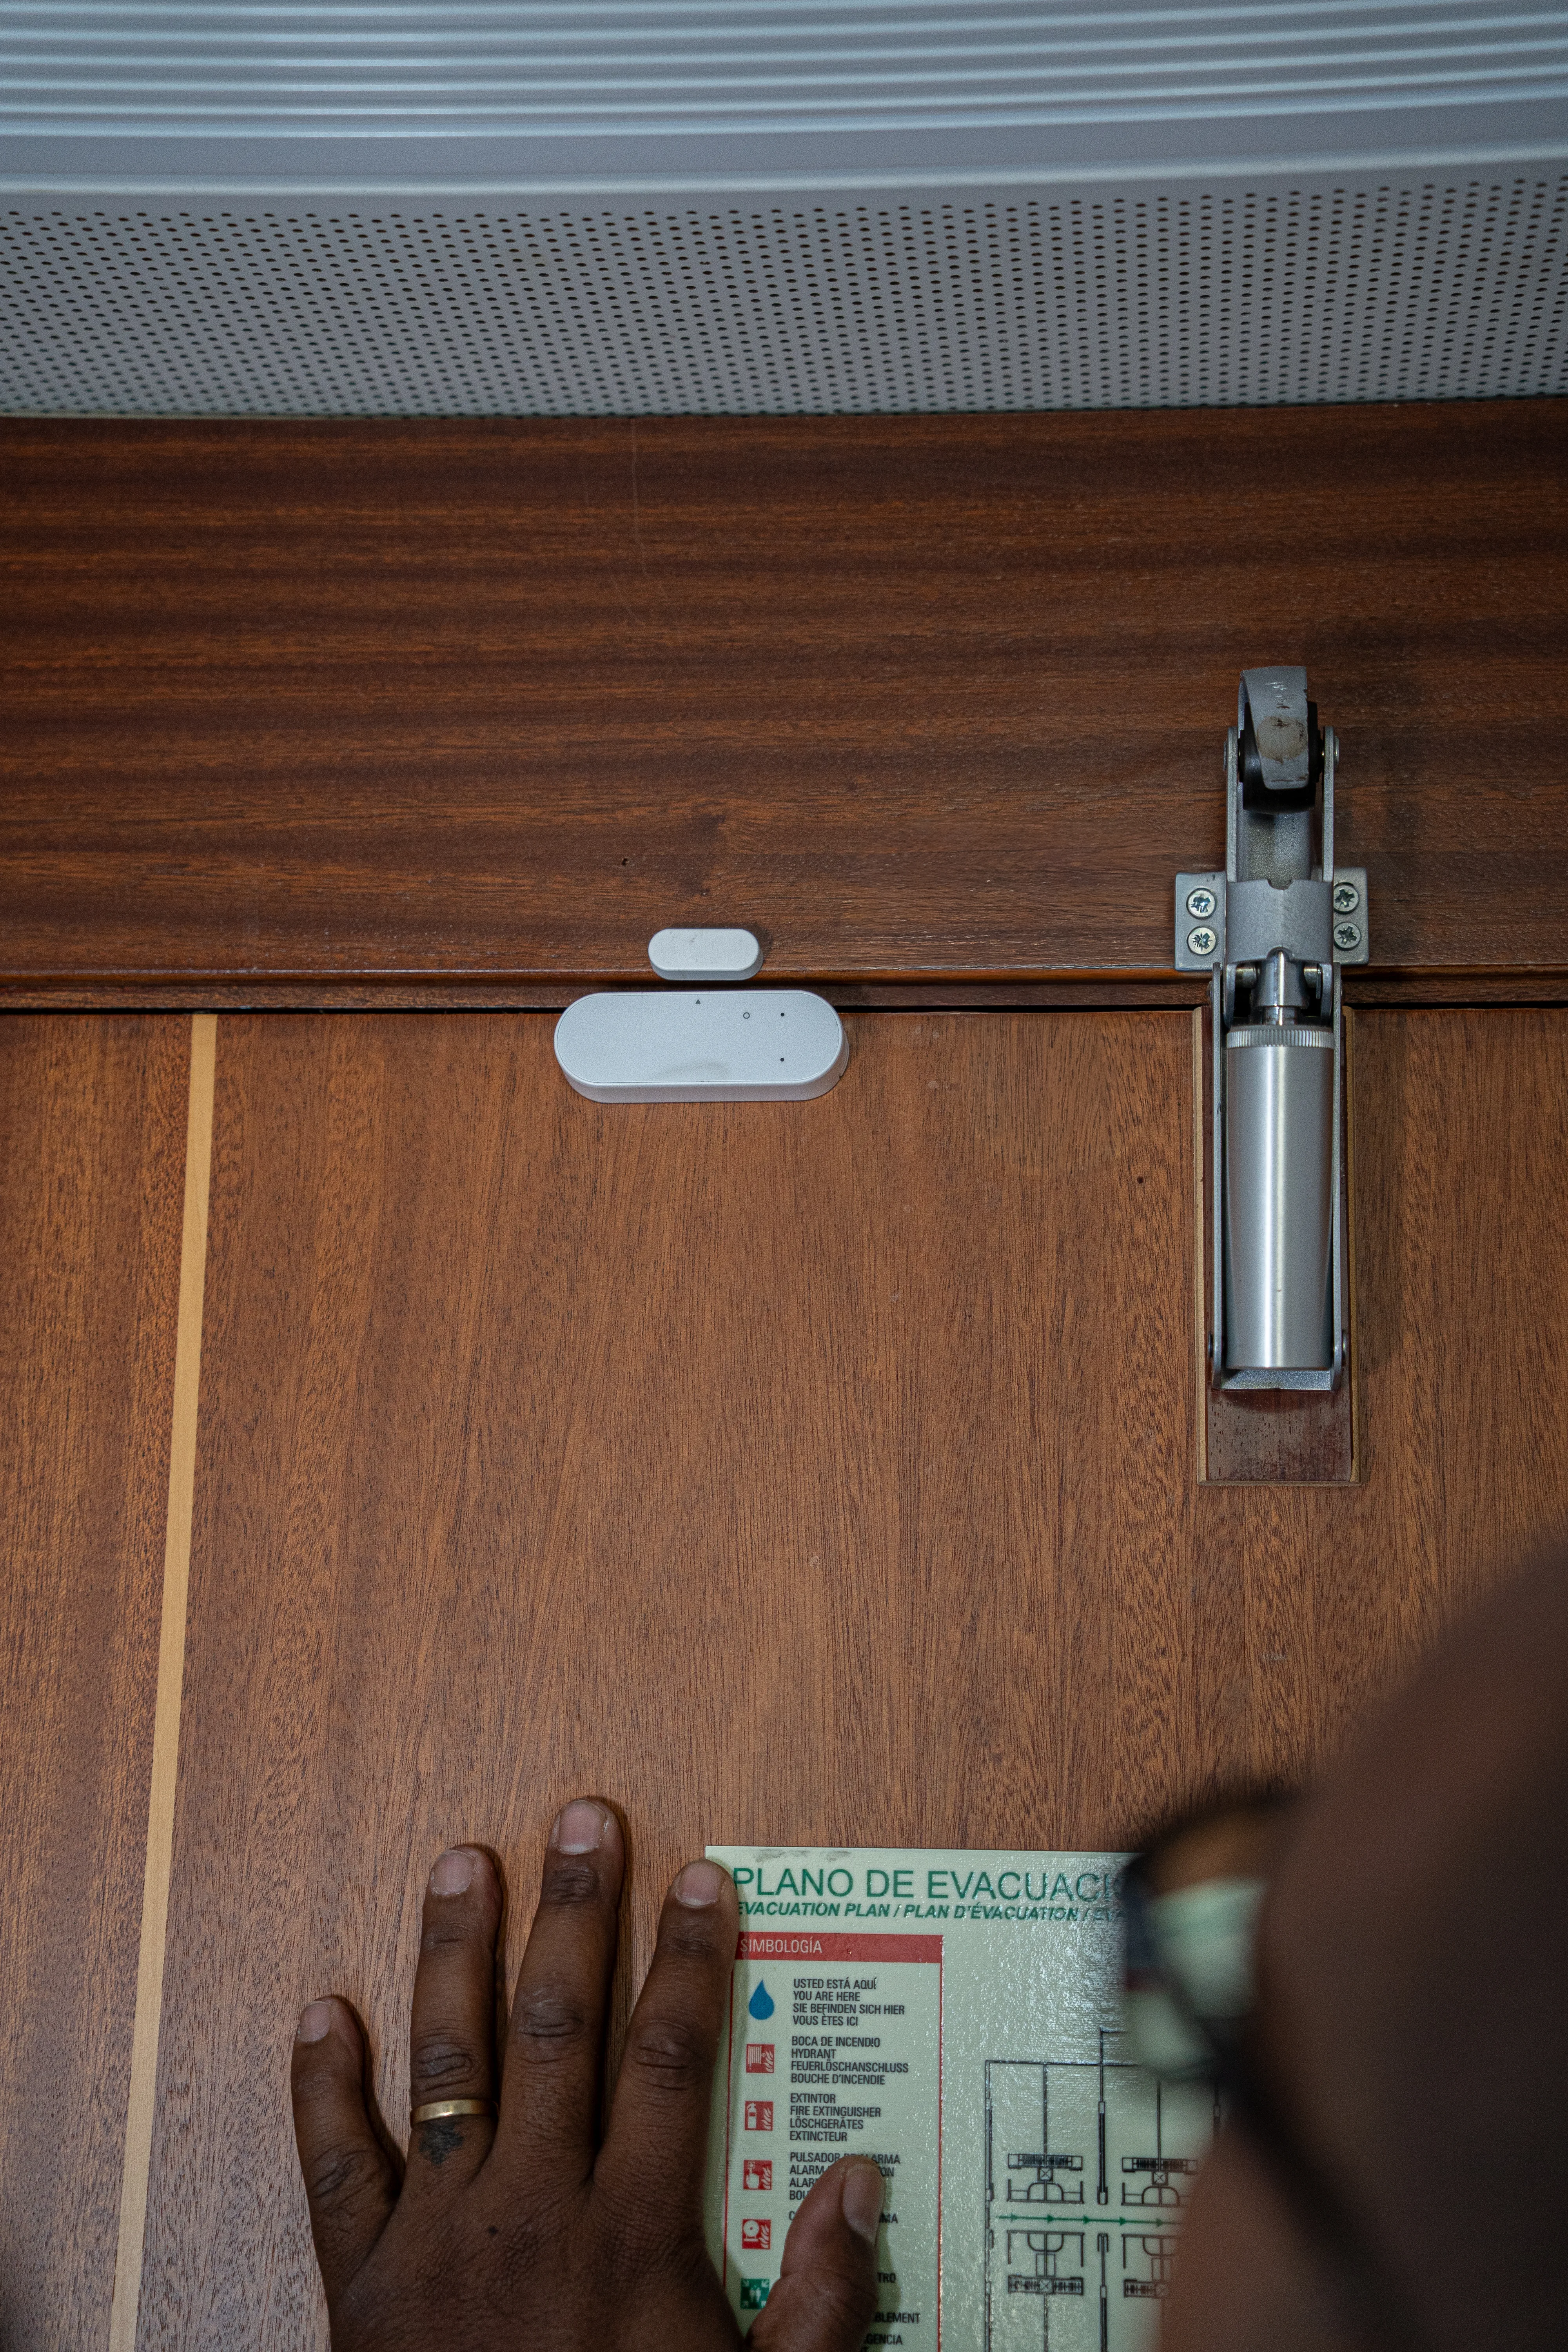
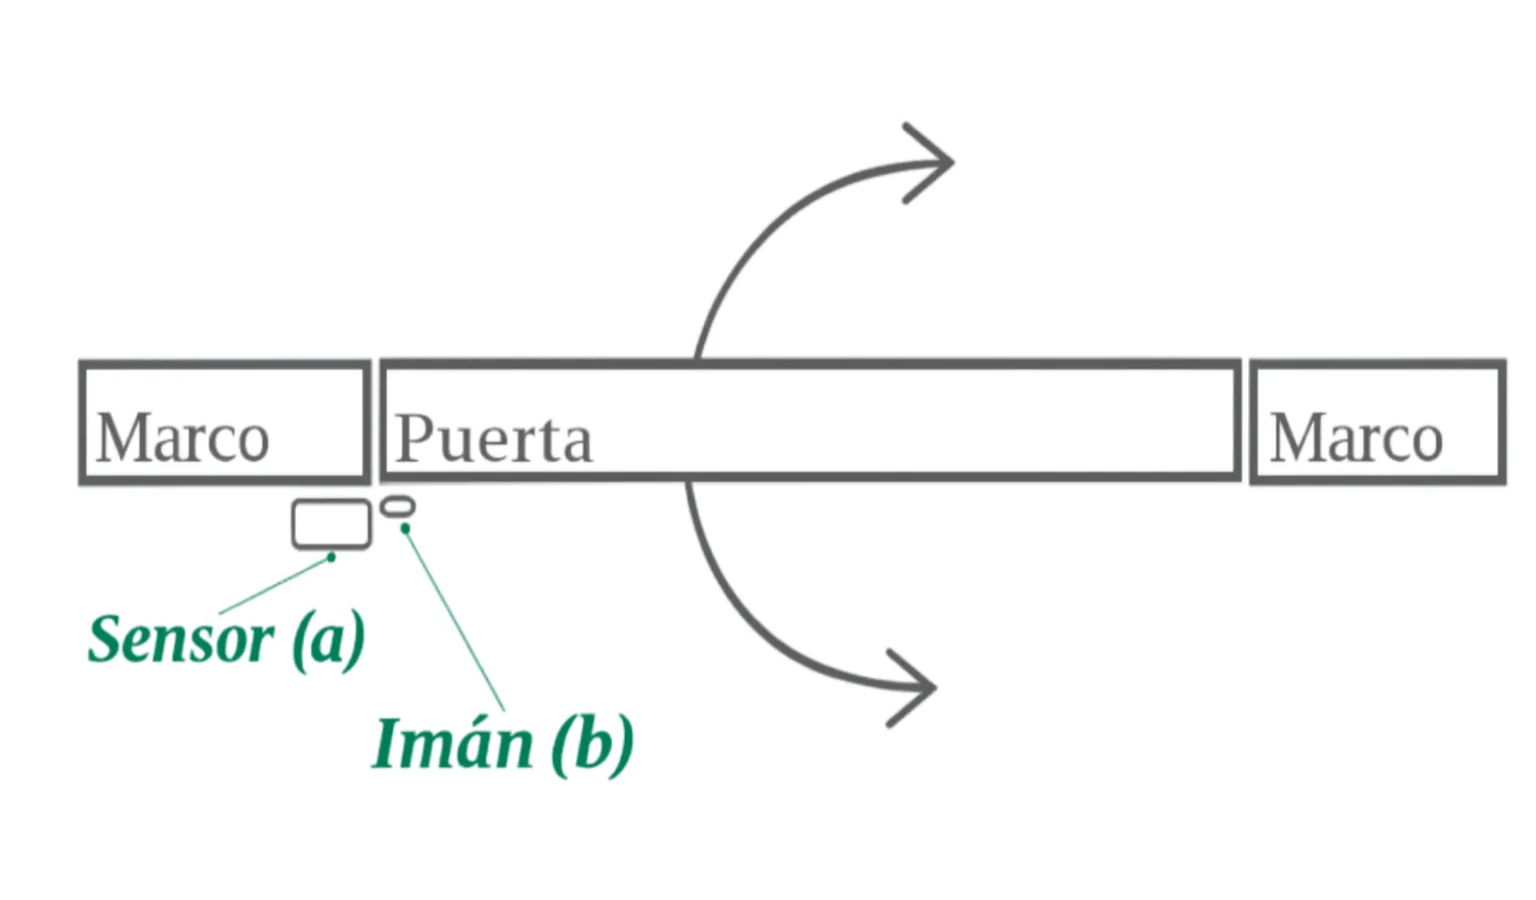
* Place the sensor on the door's fixed frame.
* Place the magnet on the moving leaf.
* The sensor's triangle must face the magnet.
* Distance between sensor and magnet: between 2 and 5 mm. On magnetic surfaces, keep a distance of 1 to 3 mm. Never exceed 5 mm.
## Mounting
Apply Sikaflex-118 Extreme Grab over the 3M adhesive base of the sensor and the magnet.
Press the sensor and magnet firmly for 10 seconds against the installation surface.
If the surface does not accept adhesive or requires greater resistance, use screws to fix the bases.
## Power supply
The sensor runs on 2 included AAA batteries. Open the compartment and verify polarity before closing it.
## Common mistakes
If you place the magnet on the fixed frame and the sensor on the moving leaf, the device may not work correctly.
A distance greater than 5 mm between sensor and magnet prevents detection of the closed state.
The sensor must always go on the fixed part. Placing it on the moving leaf exposes the wiring to breakage from movement.
The sensor's triangle must face the magnet. If they are not aligned, the magnetic contact will be erratic.
Without Sikaflex-118 Extreme Grab, the 3M adhesive may not withstand continuous use on irregular surfaces.
Keep the sensor away from the latch and hinges to avoid mechanical and magnetic interference.
## Verification
The sensor's green LED blinks when opening or closing the door or window. If it does not react:
* Check that the batteries are properly placed and charged.
* Check that the distance between sensor and magnet is correct.
* Verify Zigbee network coverage in the area.
* Sync the sensor on [app.voltic.es](https://app.voltic.es) if it does not appear on the platform.
## Related articles
* [PIR presence sensors](/en/installation/presence-sensors)
* [Operating modes](/en/operation/operating-modes)
## Related topics
- [How Sensors Work in Voltic Smart Room Control](/en/operation/sensors.md)
- [Help Center](/en/index.md)
- [Voltic Device Installation Guide](/en/installation/index.md)