> ## Documentation Index
> Fetch the complete documentation index at: https://docs.voltic.one/llms.txt
> Use this file to discover all available pages before exploring further.
# Install PIR Presence Sensors (Bedroom and Bathroom)
> Install Voltic PIR motion sensors on the ceiling of the bedroom and bathroom to automate HVAC by presence.
Voltic PIR motion sensors detect the presence of people in the room and automatically activate or deactivate HVAC. With this installation, the need for traditional key cards is eliminated and the hotel's energy consumption is optimized.
## Identification
The inner packaging label indicates the installation zone:
* **D** = Bedroom (Dormitorio)
* **B** = Bathroom (Bano)
* **S** = Living room (Salon)
* **T** = Hallway (Distribuidor)
## Bedroom sensor
### Placement
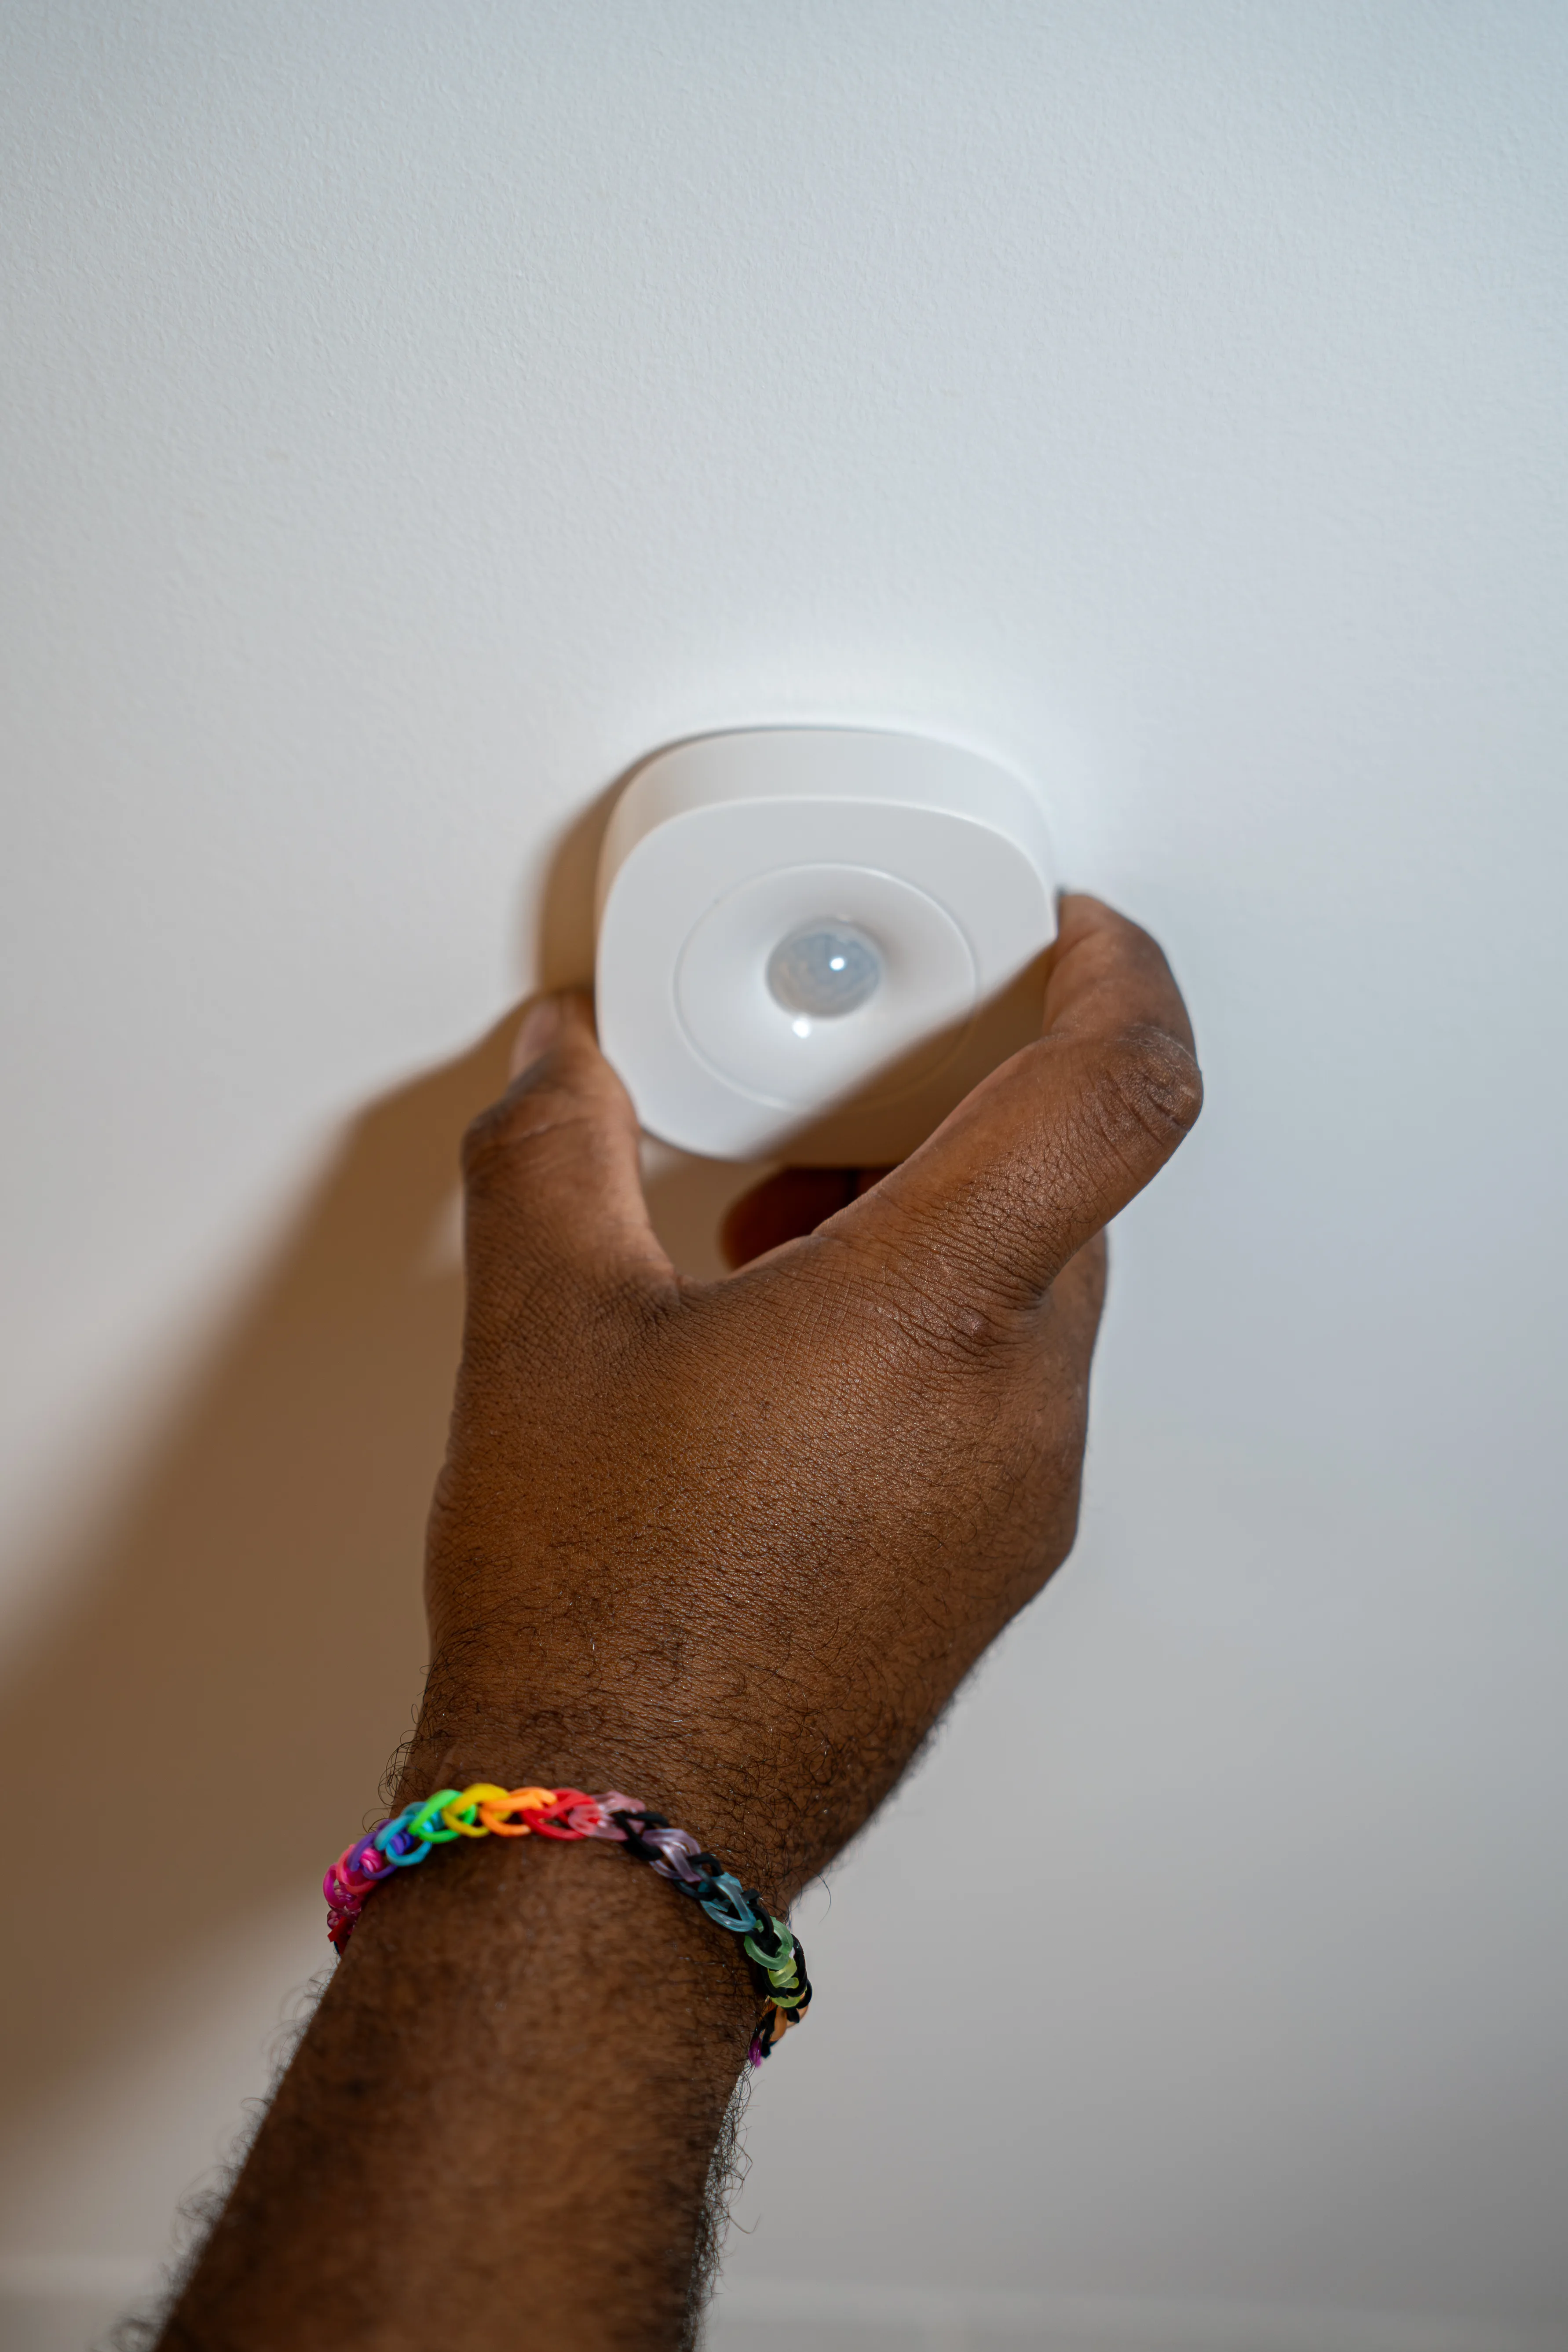
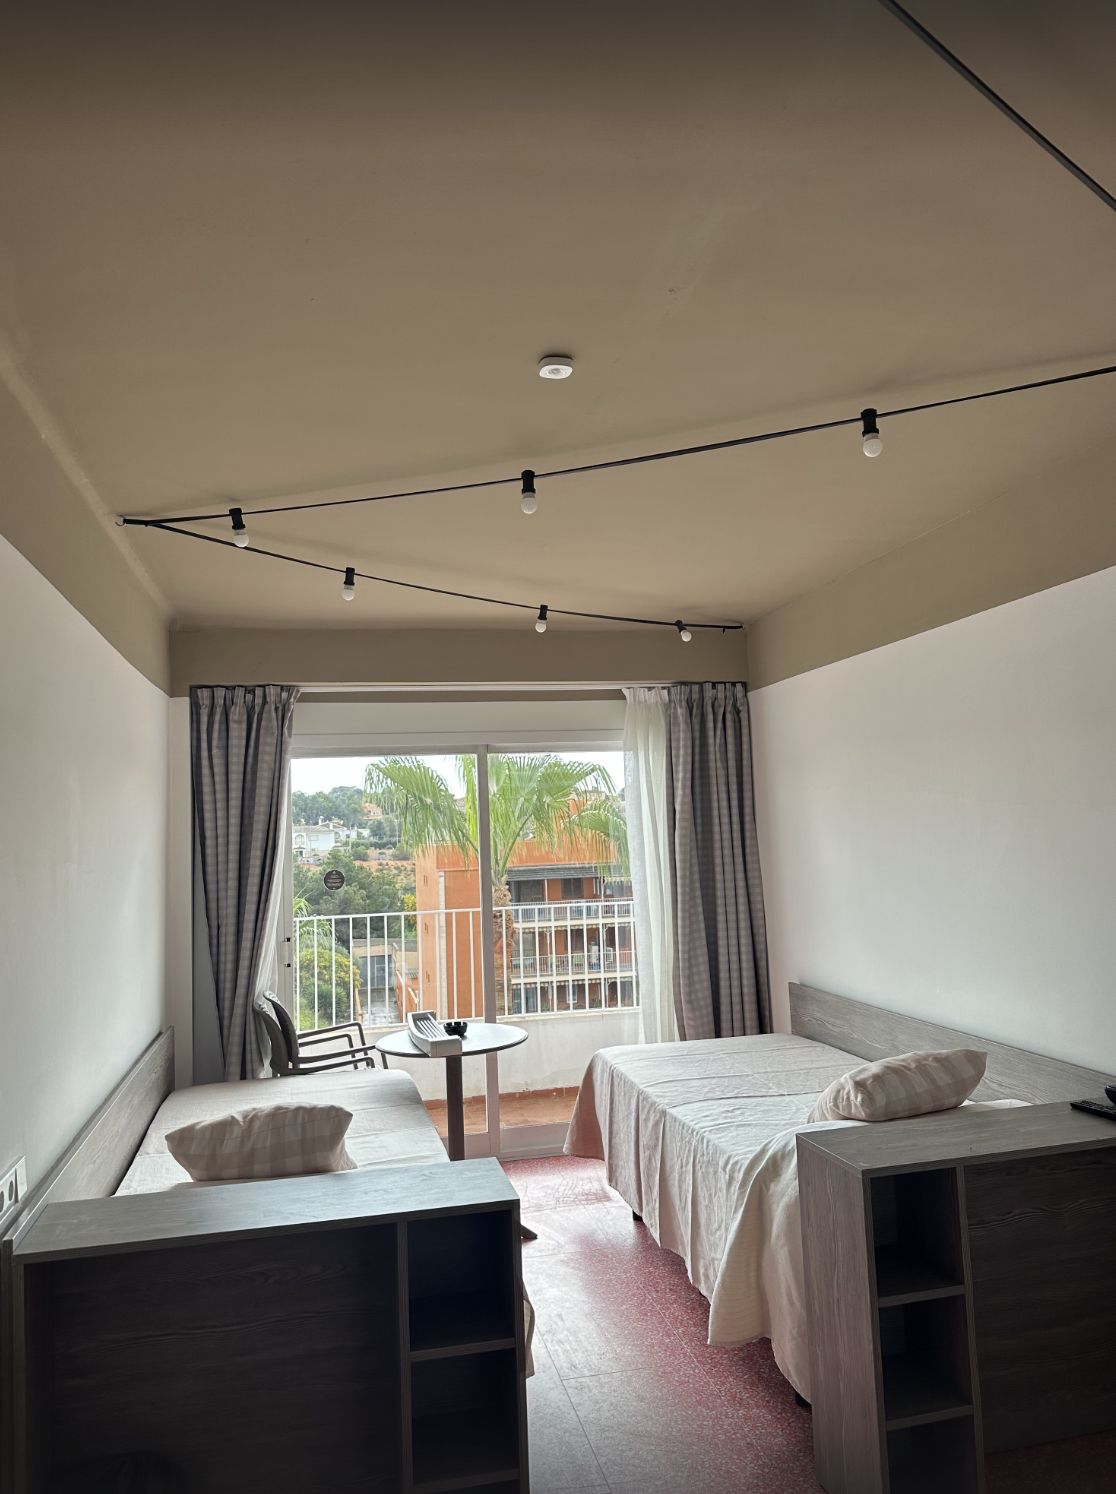
* Always install on the **ceiling**.
* Horizontal position, in the center of the space.
* Clear area, without obstacles blocking the field of view.
* Avoid windows with direct light, heat sources, and ventilation grilles.
### Coverage
* Recommended height: 2.20 to 2.50 m.
* Detection angle: 120 degrees.
* Range: up to 9 m.
### Mounting
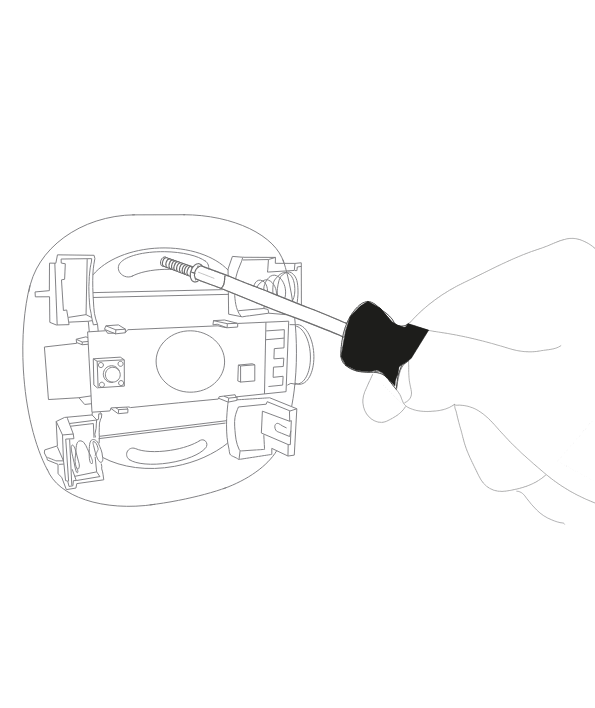
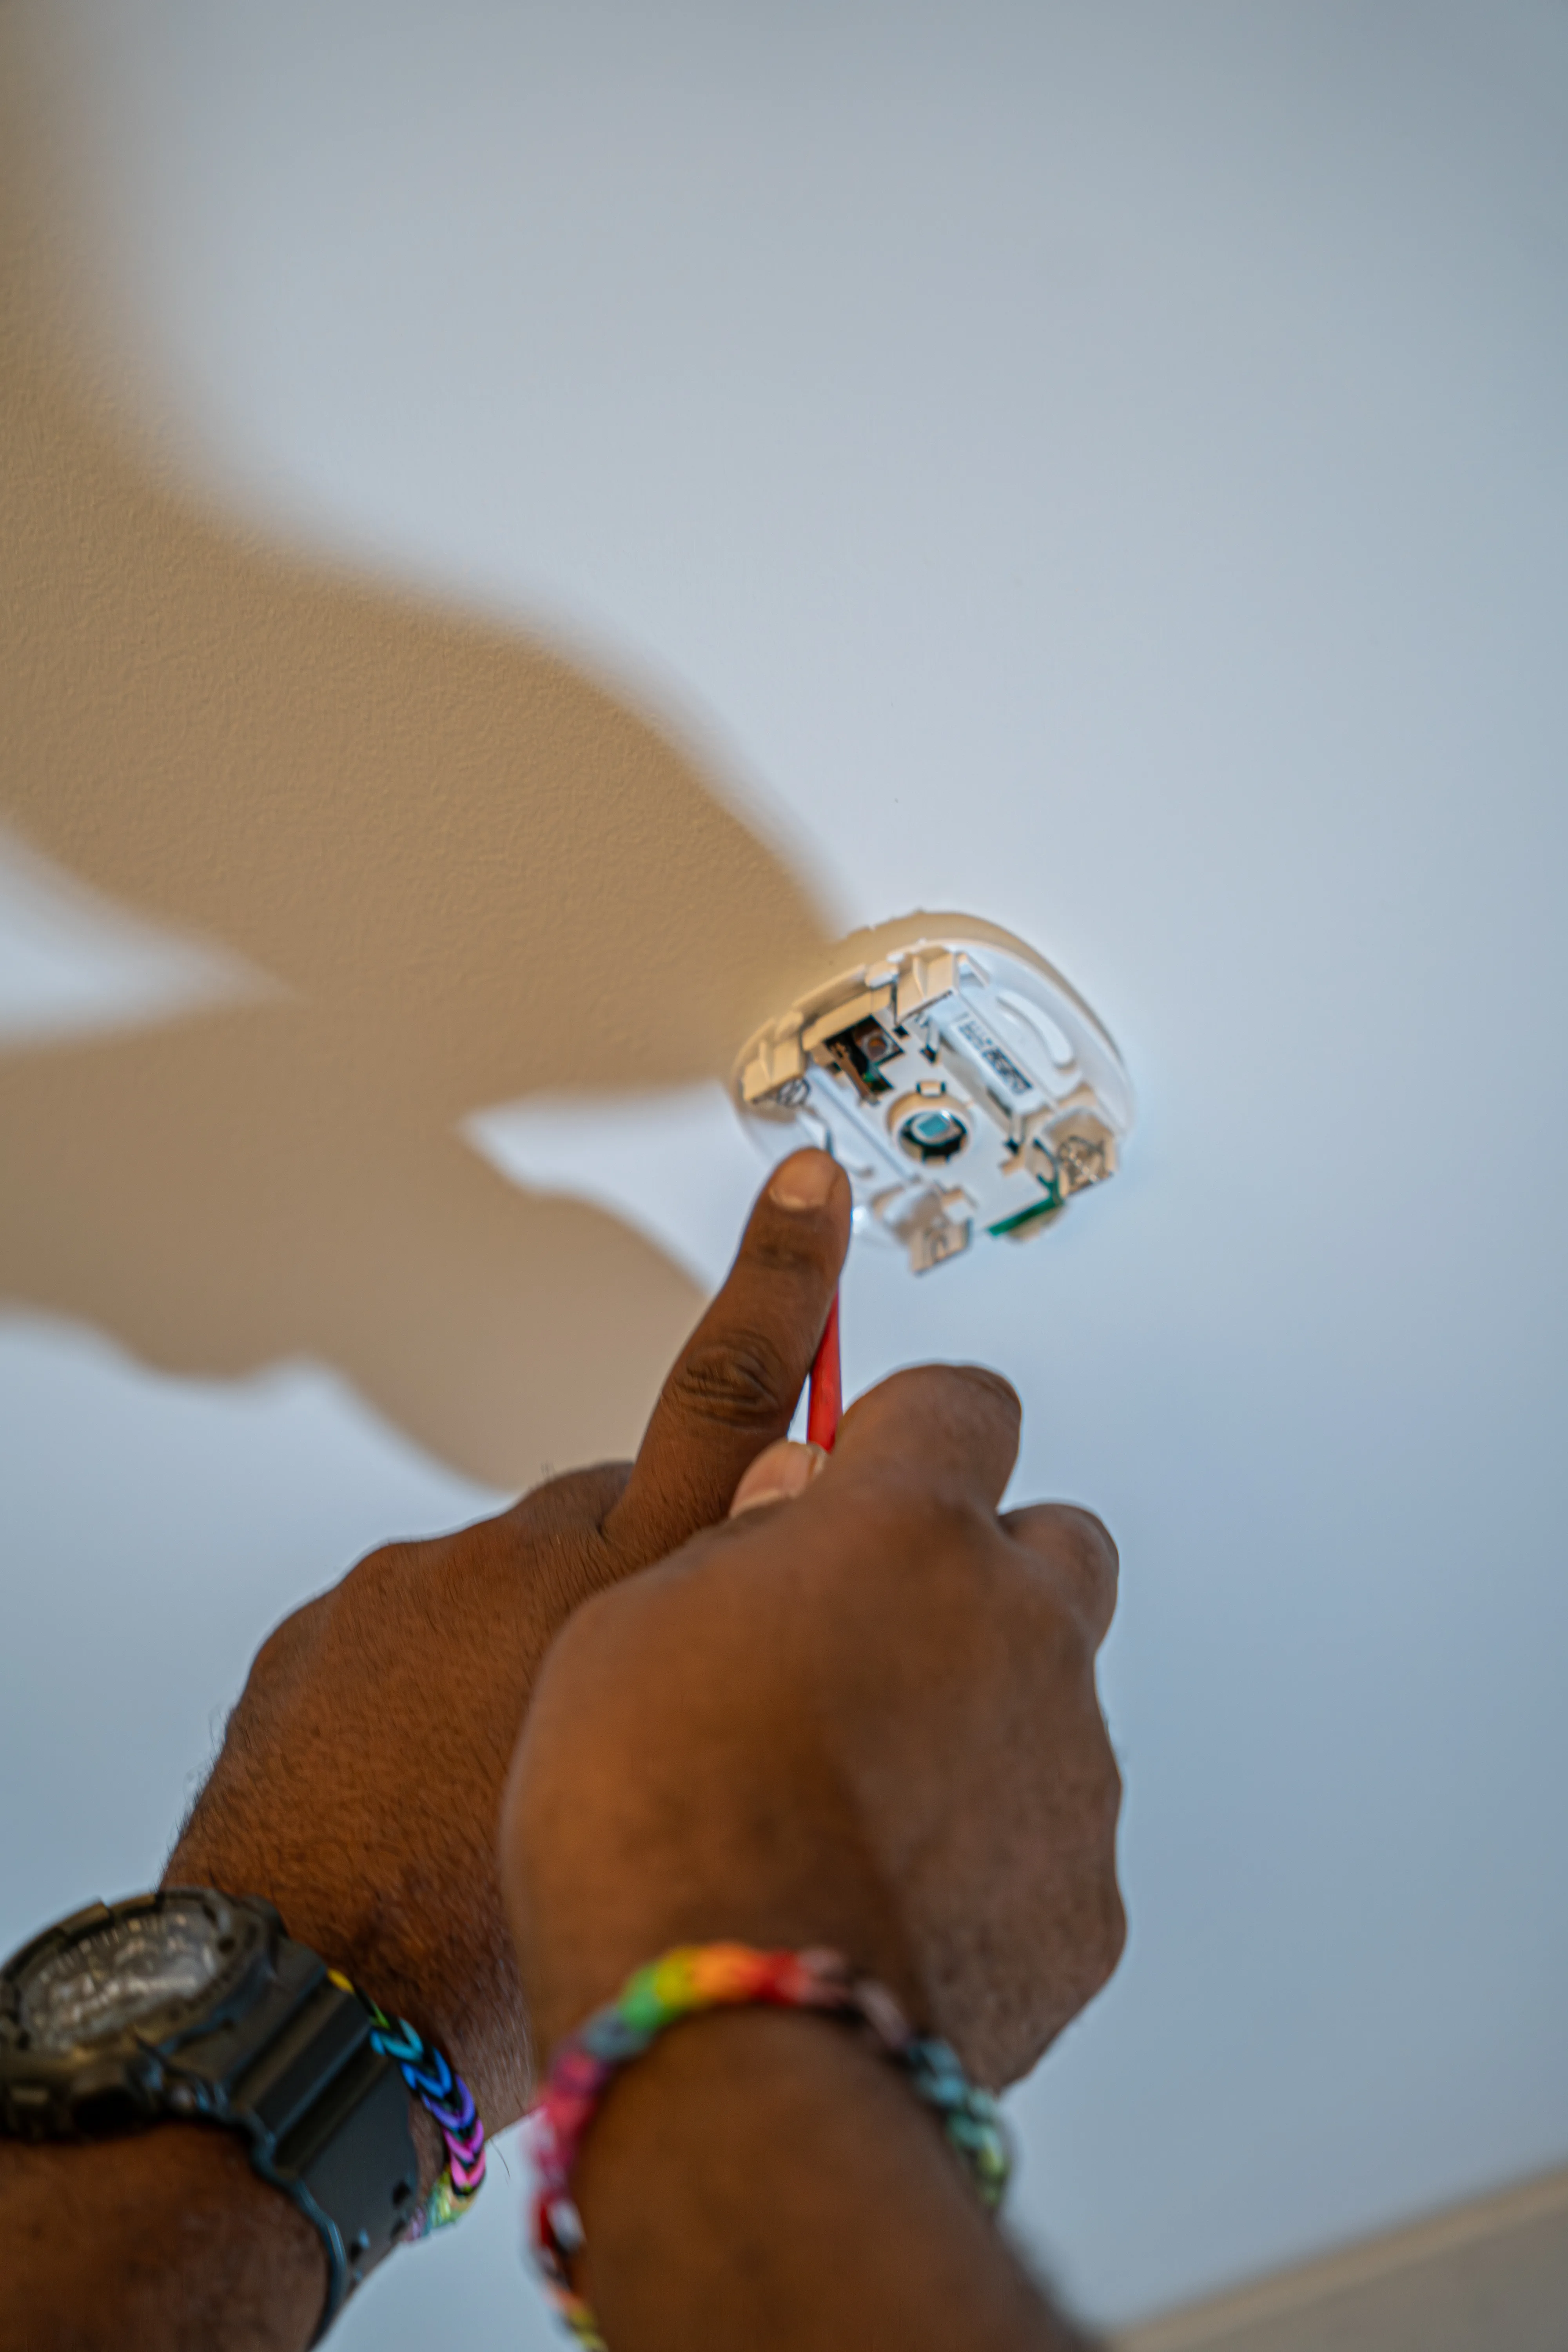
Fix the sensor **only with screws**. Do not use adhesive on the ceiling.
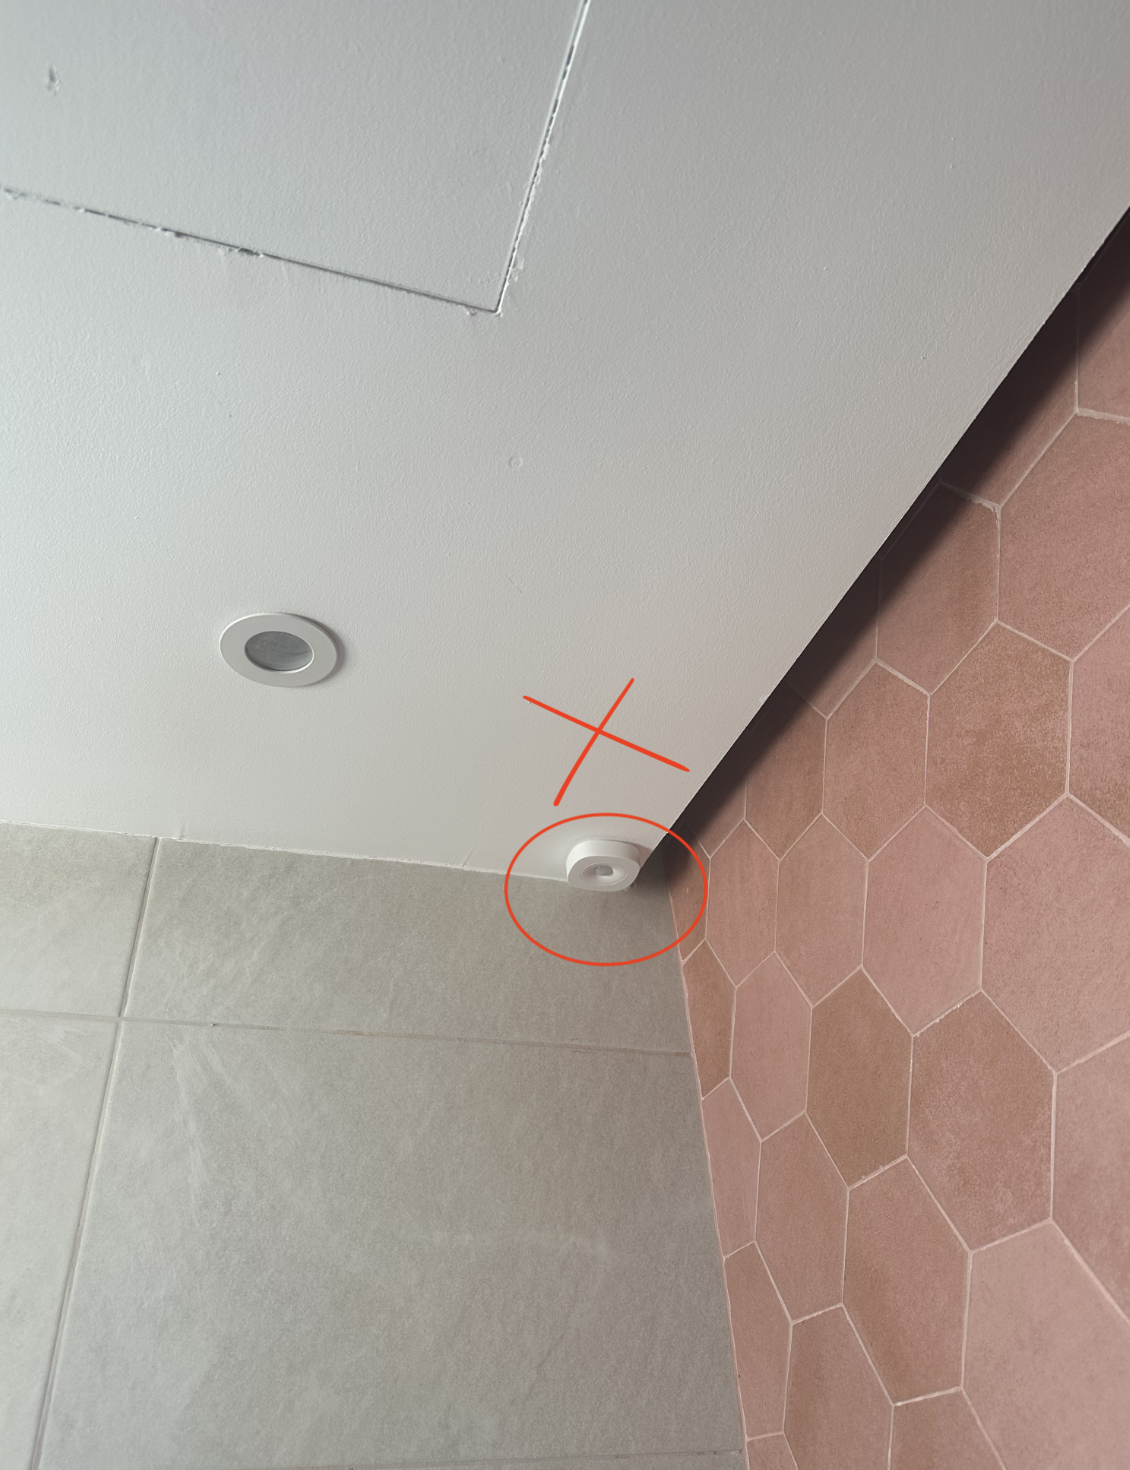
### Common mistakes in the bedroom
The sensor must go on the ceiling to properly cover the room's surface.
A radiator, lamp, or HVAC grille can cause false detections.
Curtains, blinds, or tall furniture can reduce the effective detection area.
## Bathroom sensor
### Placement
* Always install on the **ceiling**.
* Horizontal position, in the center of the space.
* Clear area, without obstacles.
* Avoid direct light and heat sources.
* Do not install near the shower or extractor, as steam and air currents can affect detection.
### Coverage
* Recommended height: 2.20 to 2.50 m.
* Detection angle: 120 degrees.
* Range: up to 9 m.
### Mounting
Fix the sensor **only with screws**. Do not use adhesive on the ceiling.
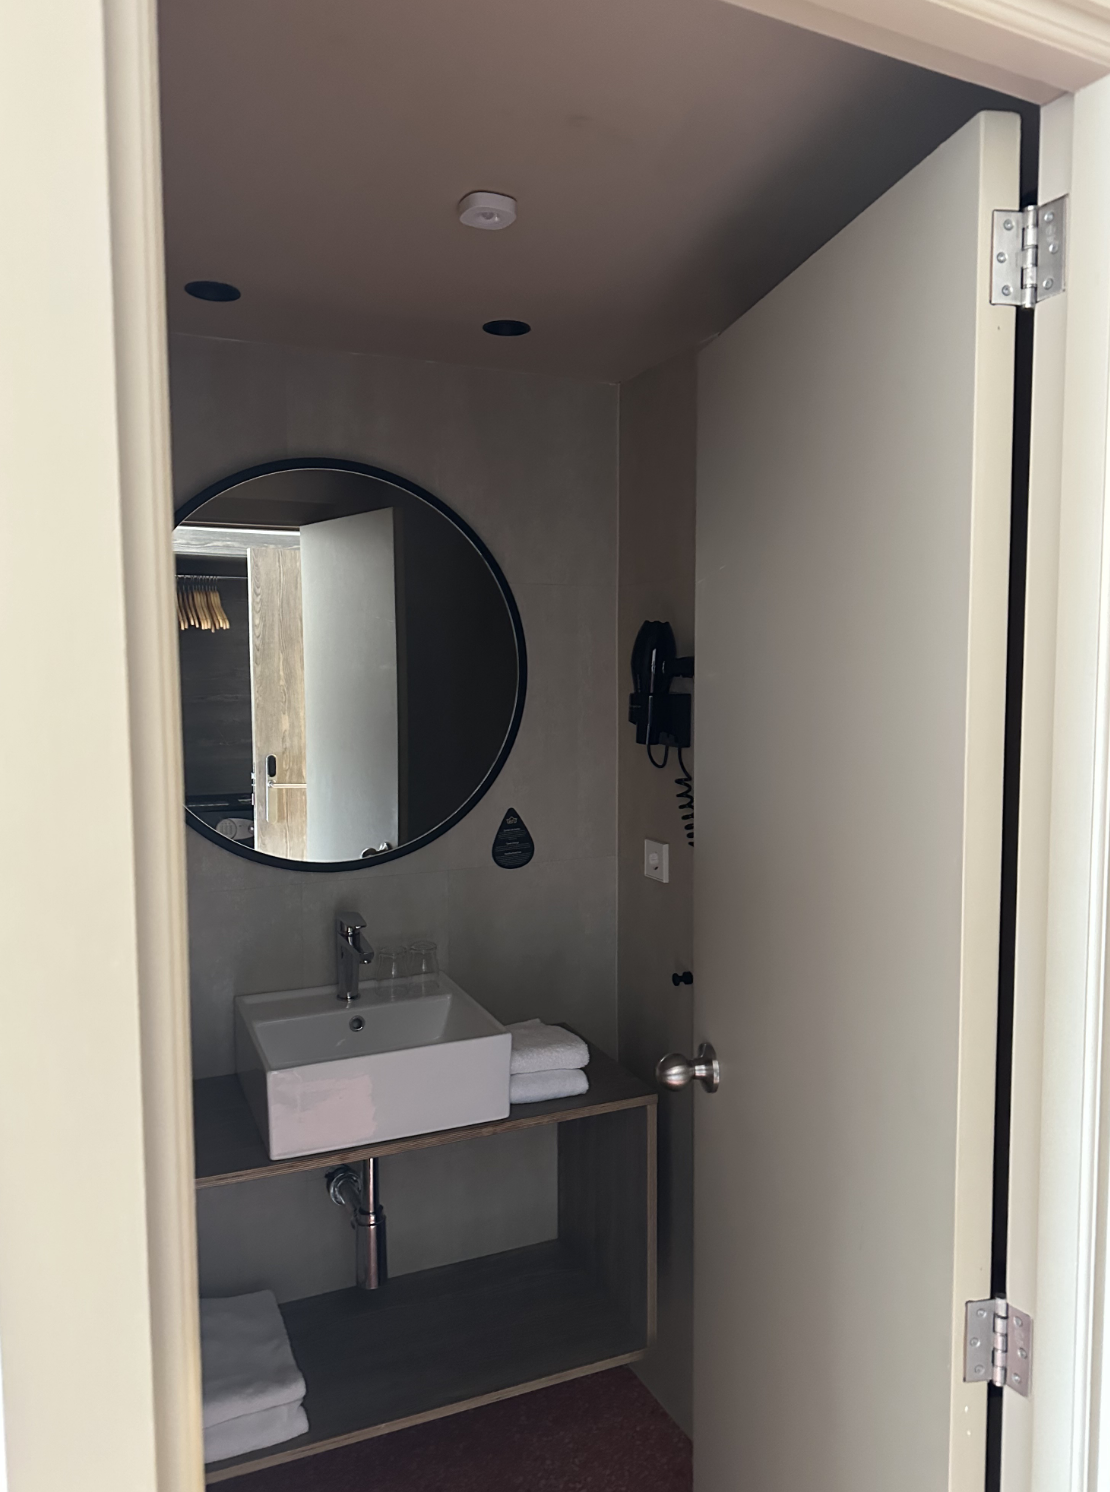
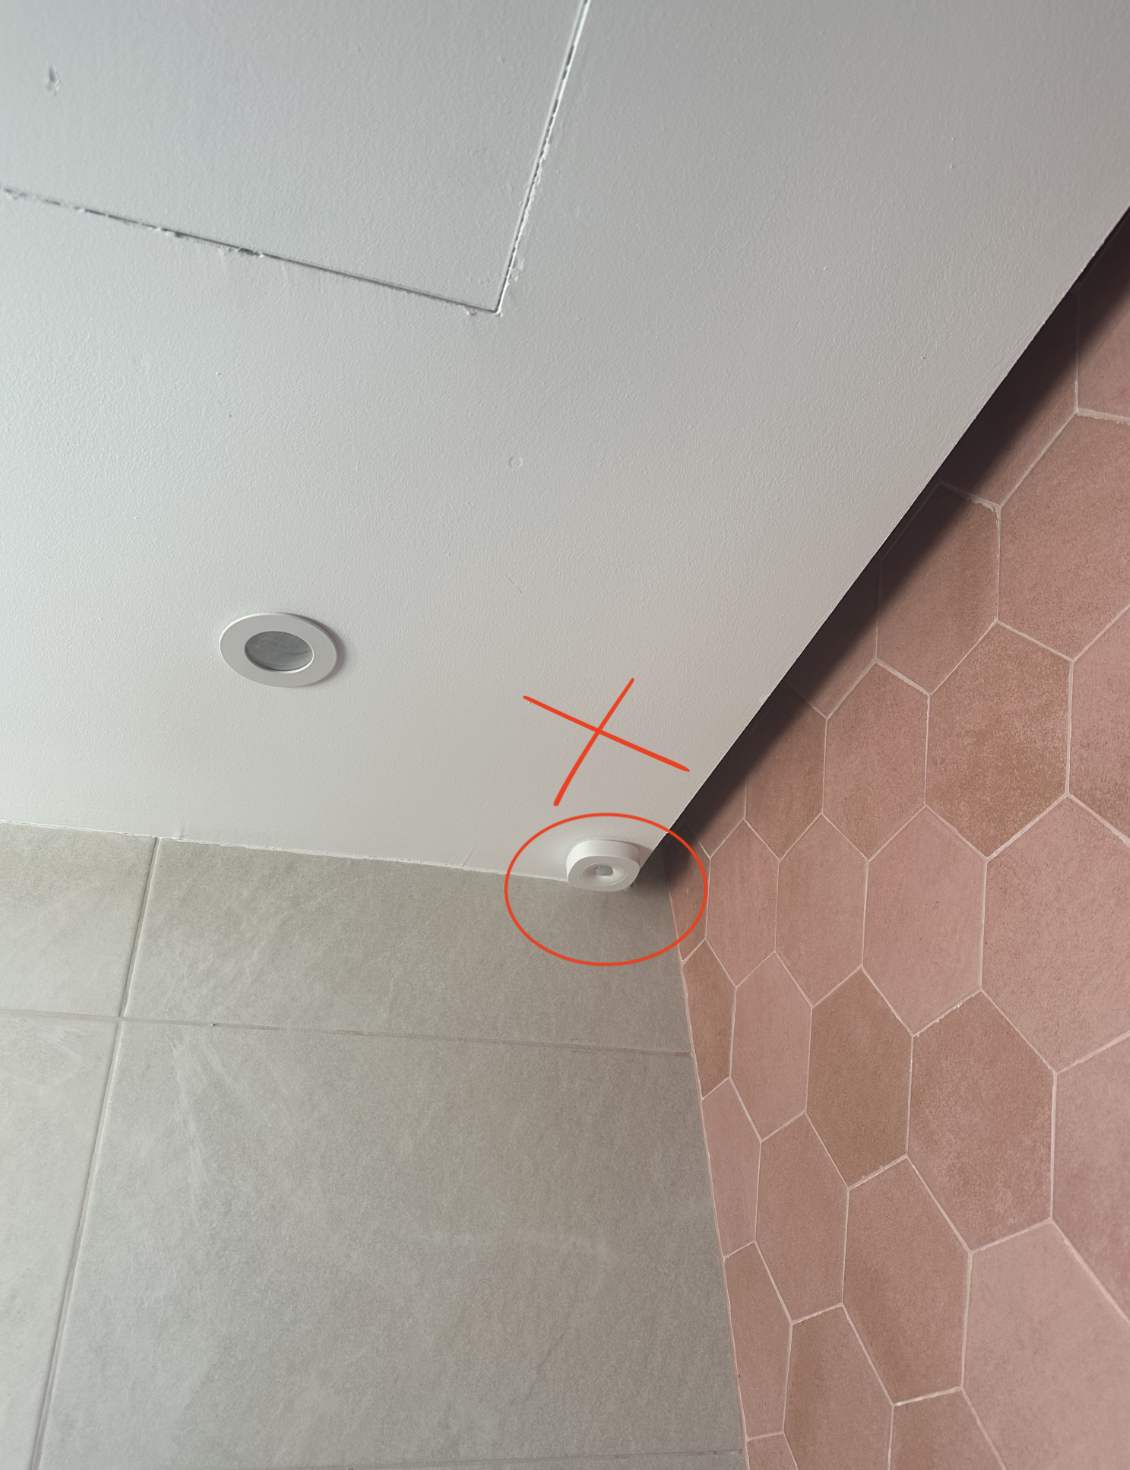
### Common mistakes in the bathroom
Steam and splashes can damage the sensor and cause incorrect readings.
Air currents from the extractor can confuse the PIR sensor and generate unwanted activations.
Bathroom humidity reduces adhesion. Always use screws.
## Power supply
The sensor runs on 2 included AA batteries. Open the compartment and verify polarity before closing it.
## Verification
The sensor's LED blinks when detecting motion. If it does not react:
* Check that the batteries are properly placed and charged.
* Check that there are no obstacles blocking the field of view.
* Verify Zigbee network coverage in the area.
* Sync the sensor on [app.voltic.es](https://app.voltic.es) if it does not appear on the platform.
## Related articles
* [Contact sensors](/en/installation/contact-sensors)
* [Sensor operation](/en/operation/sensors)
## Related topics
- [Voltic Device Installation Guide](/en/installation/index.md)
- [How Sensors Work in Voltic Smart Room Control](/en/operation/sensors.md)
- [Frequently Asked Questions About the Voltic System](/en/support/faq.md)