
Pre-Installation Checklist
Before you begin, confirm you have all components: Hardware:- Cooling Patrol Hub
- Cooling Patrol Sensors (one per cold room)
- Double-sided tape
- Drill and screws
- Screwdriver
- Calibrated reference thermometer (for verification)
- Labels or a location and serial-number log
Installation
1
Site Assessment
Choose a suitable location for the Hub before installing it:
- Dry and ventilated place, away from heat and moisture sources
- Close to the spaces where sensors will be installed
- With enough space around the Hub
- With access to USB-C power and, if possible, Ethernet (RJ-45)
2
Hub Connection
Connect the Hub in this order: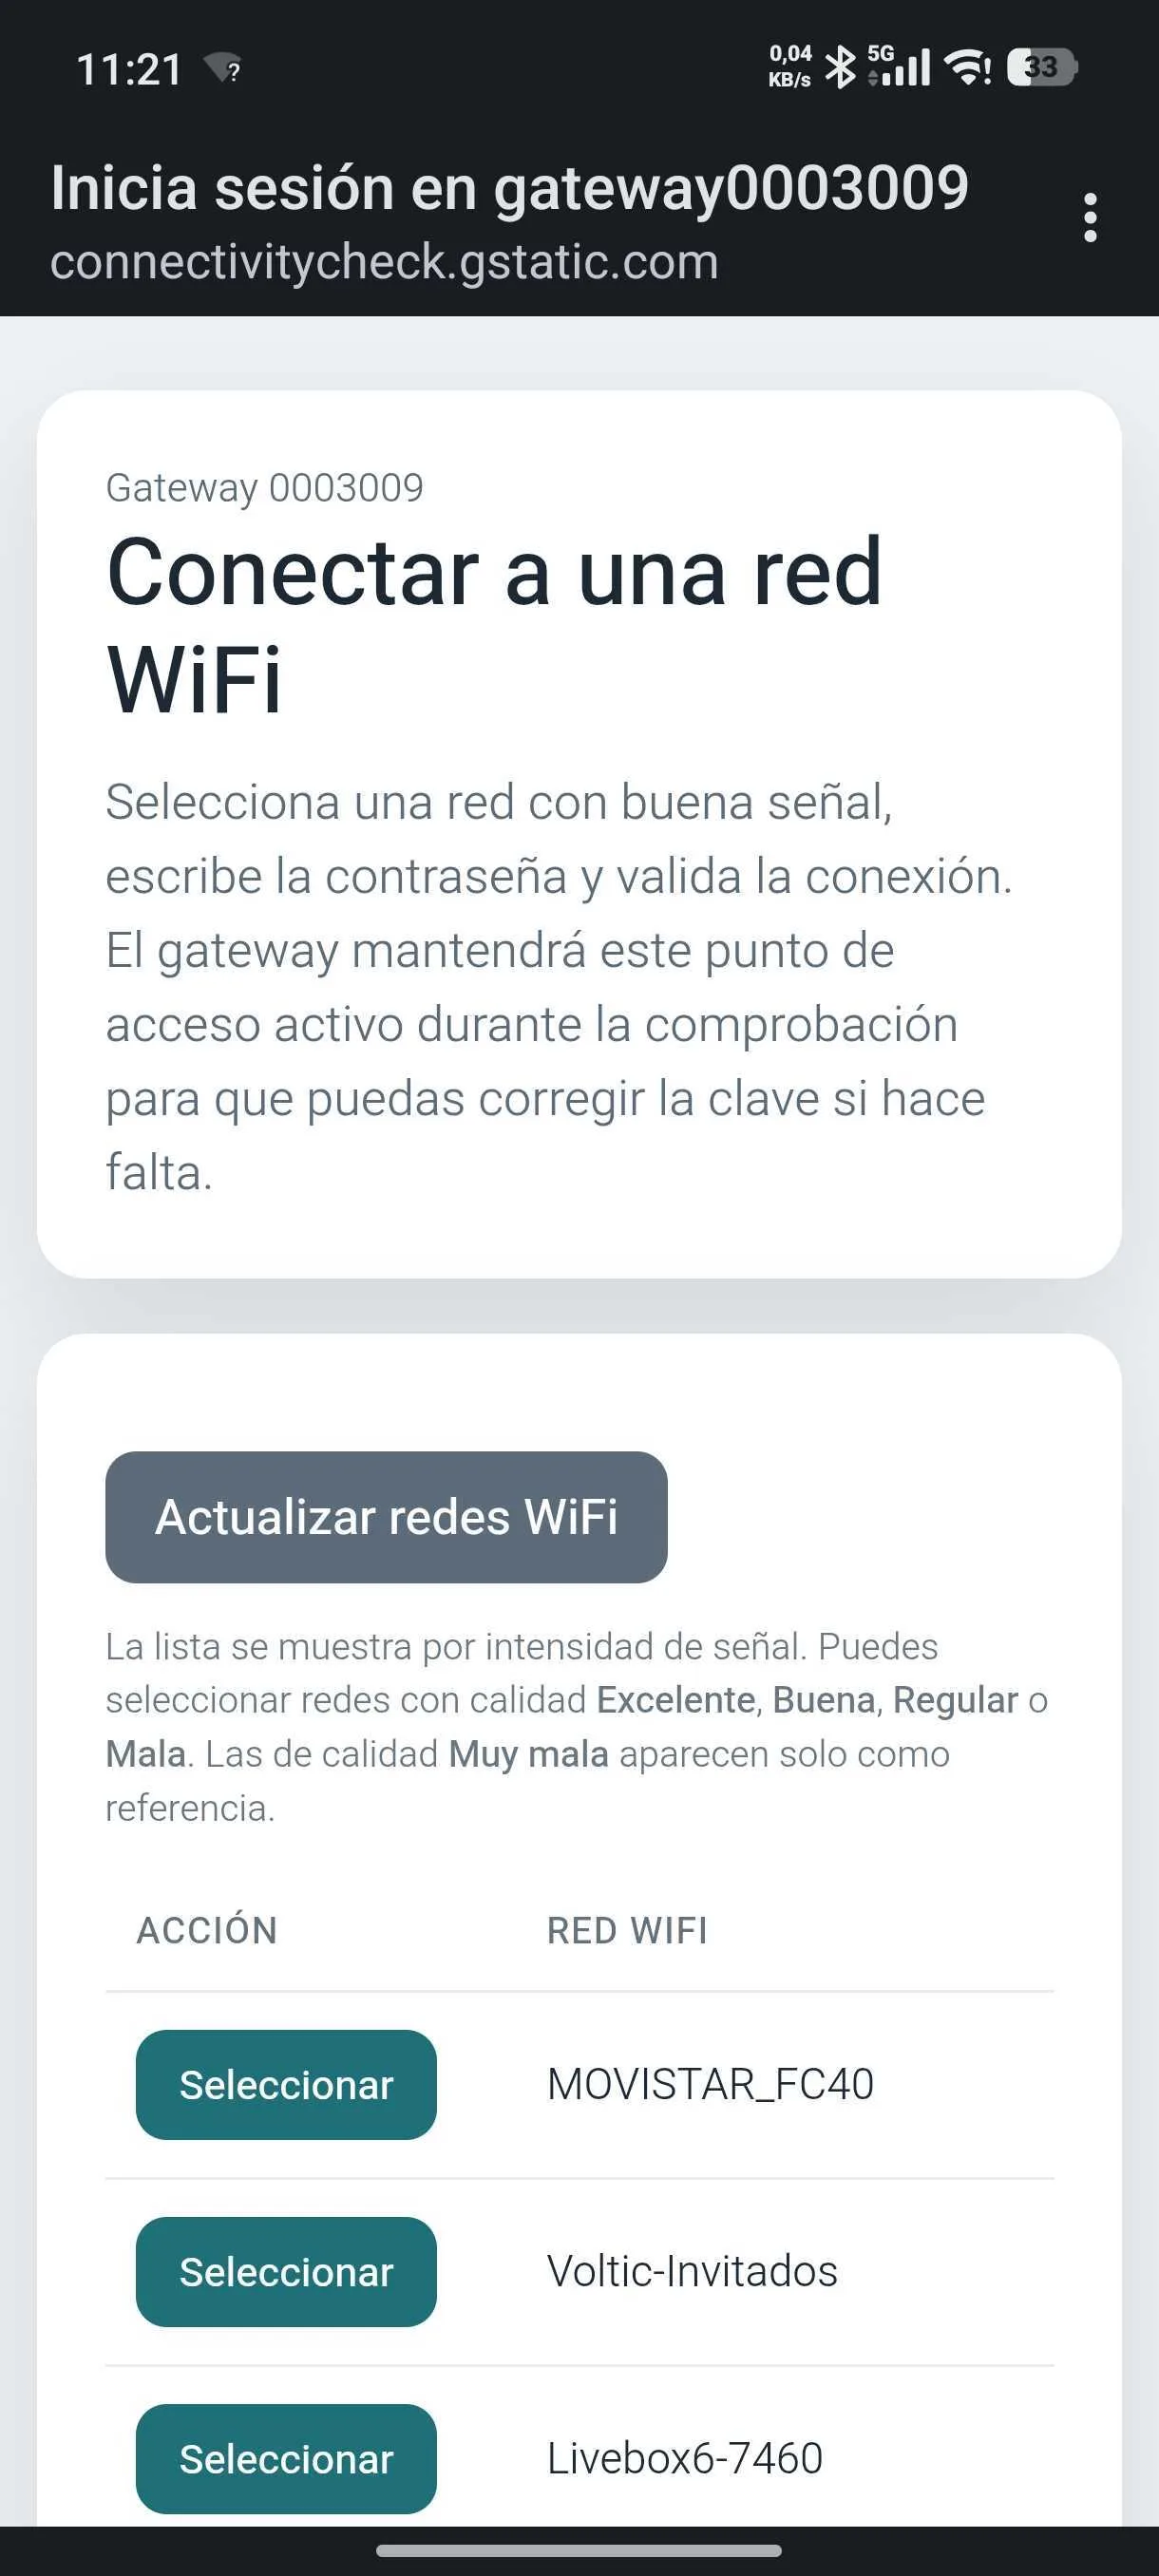
- Connect the Hub to Ethernet. If you do not have Ethernet, skip directly to step 2.
- Connect the Hub to USB-C power.
- If you are not using Ethernet, access the Wi-Fi settings on your phone, tablet, or PC.
- Select your Hub’s network (named
gateway+gateway_serial_number). - Add it to your Wi-Fi network by selecting it from the list and entering the password.
- Wait 1-2 minutes for the system to start correctly.
3
Log In to Voltic
- Go to app.voltic.es and create an account.
- Select Cooling Patrol as the building type.
- Follow the form and fill in all requested data.
4
Add Devices
- In your building’s dashboard, select the Add devices button.
- Scan the small QR code on the Hub (the small white label with the Voltic logo).
- Check that the serial number matches the one on the label.
- Add each sensor in the same way:
- Scan the sensor’s small QR code
- Check that the serial number matches
- Configure the sensor on the platform (follow the form)
- Install it in the corresponding location (inside the cold room)
- Repeat this process for each sensor.
5
Place and document each sensor
Fix the sensor using the method in the model manual. Do not cover it or rest it against a wall, ceiling, floor, tray, or product. Avoid impact, water, ice, condensation, and direct evaporator airflow.Record the sensor name, room, serial number, installation date, and a clear position reference. If you move the sensor to another room, update its location in the platform first.
6
Verify the initial reading
Once the reading has stabilized, compare it with a reference thermometer beside the measurement point. Record the difference, time, and instrument used. Do not enter an offset in the app unless the technical team confirms that the model supports it.
7
System Verification
Once you have installed all devices, check in the app that they are reporting the correct information. The sensor temperature should drop until it approaches the interior temperature of the space where it is installed, and its state should no longer be No data or Not configured.If after adding the sensor to the platform, configuring it, and installing it inside the cold room it does not report information after 30-60 minutes, contact support.
After installation
- Configure ranges in Operation, alerts, and history.
- Complete battery and maintenance checks according to the sensor manual.
- Keep evidence of onboarding, location, initial reading, and responsible person.
- See the screenshot inventory when you need to illustrate the procedure.
Cooling Patrol Support
If you encounter a problem that this guide does not resolve, contact the support team:- In-app ticket (recommended): open a ticket at app.voltic.es.
- Email (alternative): soporte@voltic.es
- Book an appointment (last option): Schedule an online support session